What Does 'Winterized' Actually Mean? Hot Tents vs 4-Season vs Canvas Prospector Tents
When people search for winterized camping tents, they're usually picturing one thing — a shelter that won't collapse under snow load and won't leave you shivering at -20°C. But "winterized" isn't a single spec; it's a category that covers a few very different tent styles, each suited to different trips. Understanding the differences before you buy will save you from showing up at a camping tent winter setup that's wrong for how you actually camp — whether that's a car camping trip near Canmore, Alberta, or a backcountry pull-in at Algonquin Provincial Park in Ontario.
Broadly, tents for winter fall into three camps:
4-season tents are the most common "winterized" option and the one most beginner-to-intermediate campers should start with. They use stronger poles, steeper wall angles to shed snow, and less mesh than a typical 3-season tent, trapping more heat inside. They're not heated — you're still relying on your sleeping bag and pad — but they hold up to wind and snow load far better than a summer tent.
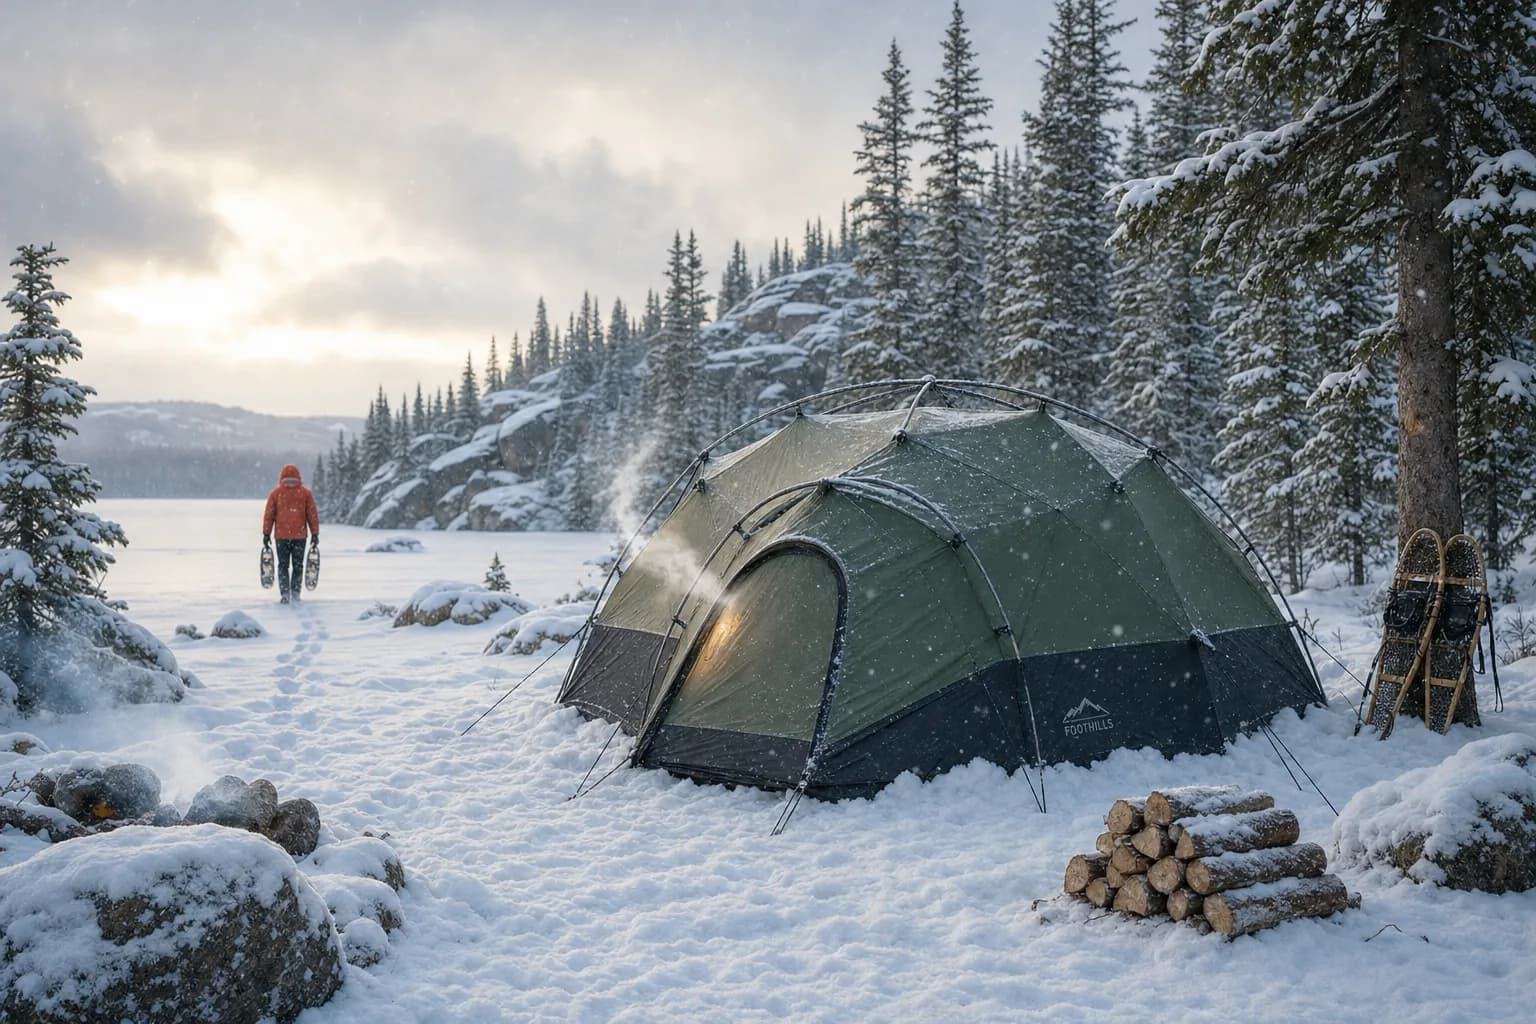
Hot tents are a different animal entirely. These are canvas or synthetic shelters designed with a stove jack — a heat-resistant port that lets you run a small wood stove inside. They're popular for extended winter trips in places like the Rockies or northern Ontario, where campers want an actual heat source rather than just insulation. They're heavier, pricier, and require you to learn stove management, but they turn a cold night into a genuinely comfortable one.
Canvas prospector tents are the traditional pyramid-style, wall-tent hybrids used by hunters and outfitters for generations. They're typically paired with a wood stove too, sit close to hot-tent territory, and are known for durability and breathability, but they're bulkier and less packable than modern synthetic options.
| Type | Heat source | Best for | Weight |
|---|---|---|---|
| 4-season | Sleeping bag/pad only | Weekend car camping, shoulder-season trips | Light-moderate |
| Hot tent | Wood stove | Multi-night winter basecamps | Moderate-heavy |
| Canvas prospector | Wood stove | Extended stays, outfitter-style camps | Heavy |
Before choosing, check current conditions through Environment and Climate Change Canada's weather service and confirm the park you're headed to allows winter camping and open fires — our Complete Guide to Winter Camping in Canada covers site selection and setup basics in more detail.
Key Features to Look For: Snow Load, Pole Strength, Ventilation and Fabric Choices
Once you've decided what category of tent you need, the real shopping starts. This is where a lot of Canadian campers get tripped up — a tent can be labelled "winterized" and still fold under a heavy Ontario lake-effect dump or a Chinook-driven windstorm in the Alberta foothills. Here's what actually separates a tent that survives winter from one that just talks a good game.
Geodesic vs dome design. A true geodesic tent has multiple intersecting poles that create a web of triangles across the tent body. That crisscross pattern distributes stress evenly, which is exactly what you want when wet snow is piling up on the fly overnight. A standard dome tent, by contrast, usually relies on two or three poles meeting at a single crossover point. It's fine for a calm September weekend at a place like Killbear Provincial Park, but under real snow load it can bow or snap. If you're camping anywhere snow accumulation is likely, spend the extra money on a geodesic or semi-geodesic design.
Pole material and count matters too. Aluminum poles (7000-series especially) flex under load and spring back, while cheaper fibreglass poles crack in the cold. More poles generally means more support, but also more setup time with frozen fingers — worth practicing at home first.
Guy-out points and snow skirts. Look for multiple reinforced guy-out loops around the tent's perimeter and near the peak, not just at the corners. In wind, these are what keep your tent from becoming a kite. A snow skirt — a fabric flap that runs along the base of the tent — lets you pile snow on it to seal out drafts and stop wind from getting underneath the floor.
Ventilation and condensation control. Cold air holds less moisture, so condensation builds fast inside a sealed tent, especially with a wood stove or your own breath overnight. Look for adjustable vents high on the tent body, mesh panels that can be closed off, and a fly that's pitched with enough of a gap for airflow.
Fabric: ripstop nylon vs canvas. Ripstop nylon is light, packs small, and dries quickly — good for backcountry trips where you're carrying everything in. Canvas is heavier and slower to dry, but it breathes better, handles wood stove heat safely, and holds up longer against abrasive wind-driven snow and sub-zero flexing. For basecamp winter trips, we lean canvas; for ski-in or backcountry sites, nylon usually makes more sense.
Before heading out, always check current BC Parks fire ban notices or the equivalent provincial wildfire service page, since winter camping restrictions and closures can change with little notice.
Sizing, Stove Jacks and Choosing Between Hot Tents and Insulated Shelters
Sizing a winter tent is a different exercise than sizing a three-season one. A tent rated for four people in July might sleep two comfortably in January once you factor in gear storage, a wood stove, and the extra clothing everyone's wearing inside. Rule of thumb: for winter use, size up one category from what you'd normally choose. A "4-person" hot tent is realistic for two adults plus packs, boots, and a small stove setup — not four sleeping bodies.
If you're going the hot tent route, the stove jack itself needs some thought. Look at where it's positioned relative to the door and sleeping area — a jack too close to bedding is a fire and melt-hole risk, while one too far from the stove's natural placement makes setup awkward. Check that the jack diameter matches your stove pipe (most Canadian-market wood stoves for tents run 3 to 4 inches), and confirm the manufacturer includes a heat-resistant collar, not just a hole with fabric trim. A loose or poorly sealed jack is where sparks and moisture both find their way in.
Floor space math is worth doing before you buy. Budget roughly:
- 1.2 to 1.5 m² per sleeping adult (pad plus wiggle room)
- A stove footprint of about 0.5 to 1 m², plus clearance on all sides per the stove manufacturer's spec
- Space near the door for wet boots, packs, and firewood you're drying overnight
Hot tent vs. stoveless insulated shelter — how to decide:
| Consider a hot tent if... | Consider a stoveless insulated tent if... |
|---|---|
| You're basecamping multiple nights in deep cold | You're doing shorter trips or mobile itineraries |
| You have wood available or plan to carry fuel | You want to skip fire management and pipe upkeep |
| You're comfortable with stove/fire safety | You're camping somewhere with fire restrictions |
| Weight isn't a major constraint (vehicle or sled access) | You're backpacking or ski-touring in |
Hot tents win for comfort on longer, colder stays — nothing beats drying gear by a stove after a day in the snow. But they add weight, cost, and a learning curve around fire safety in a fabric structure. Stoveless insulated shelters are simpler: no chimney fires, no pipe to pack, and often lighter for backcountry travel, though you're relying entirely on your sleeping system for warmth.
Always check current fire restrictions before assuming a stove is even an option — provincial wildfire services and park offices post updates on bans that apply to portable wood stoves, not just campfires. If you're camping in a provincial or national park, the park's official page will also note any site-specific rules around open flame or stovepipe use.
Pitching, Anchoring and Safety in Snow: Setup Tips and Cold-Weather Hazards
Even the best winterized camping tents will let you down if they're pitched poorly. Snow doesn't hold gear the way packed dirt does, so your anchoring system needs to change completely once the ground freezes or gets buried under fresh powder.
Start by packing a snow platform before you set anything up. Strap on your snowshoes or skis and stomp out the full footprint of your tent, plus a metre or so of buffer around the edges. Let it sit for 15–20 minutes to firm up before you pitch. Skipping this step is how you end up sleeping in a lumpy trench by 2 a.m., with body heat melting hollows under your hips and shoulders.
Regular stakes are close to useless in snow — they pull straight out. Swap them for wide, snow-specific stakes, or better yet, build deadman anchors. Bury a stuff sack full of snow, a tent stake laid horizontally, or even a bundle of sticks a foot or two down, tie your guyline to it, and let the snow refreeze around it. Give it time before you load it up. This trick is standard practice for anyone winter camping in the backcountry of parks like Banff National Park, where wind can hit hard overnight.
A few safety essentials matter as much as the pitch itself:
- Carbon monoxide risk: never run a wood stove or any combustion heater in an unventilated tent. Crack a vent even in a hot tent with a stove jack, and consider a battery-powered CO detector — it's inexpensive insurance.
- Snow load awareness: check your tent walls after any snowfall. A few centimetres is fine; accumulated wet snow can bend poles or collapse a roof. Knock it off gently from inside using an upward push, not a downward slap.
- Hypothermia prevention: keep a dry base layer reserved just for sleeping, and know the early signs — shivering, fumbling hands, slurred speech.
Before heading out, check Environment and Climate Change Canada's weather forecasts and any active provincial park advisories for overnight lows and wind warnings.
Budget, Mid-Range and Premium Winter Tents, Sleep Systems and Maintenance
Winterized camping tents span a wide price range, and what you pay usually tracks with pole strength, fabric weight, and how much fussing the shelter needs in a storm. Budget four-season tents (roughly $150–$350 CAD) are typically single-wall or basic double-wall designs with alloy poles rated for moderate snow load — fine for a weekend at a plowed campground loop but not what you want in an exposed backcountry site during a Rocky Mountain squall. Mid-range tents ($350–$700 CAD) start adding stronger pole geometry, better vestibules, and reinforced guy-out points, which is where most Canadian winter campers land. Premium tents and canvas prospector-style hot tents ($700–$2,000+ CAD) bring heavier-gauge poles, superior snow-shedding fabric, and stove jack options built for repeated use in serious cold.
Whatever tier you buy into, the tent is only half the equation. A tent rated for -20°C conditions won't keep you warm if your sleeping bag isn't matched to it. As a rule of thumb, buy a bag rated at least 5–10°C colder than the lowest temperature you expect, since manufacturer ratings are optimistic for most sleepers. Pair it with an insulated pad — look for an R-value of 4 or higher for winter car camping, and stack a foam pad under an inflatable one for extra insurance against ground cold, which pulls heat faster than air temperature does. This combination matters as much at a serviced site in Ontario Parks as it does on crown land near Golden, BC.
Off-season care and storage:
- Dry your tent completely before packing it away — damp canvas or nylon breeds mildew fast, even in a cold garage.
- Brush off pitch, ash, or dirt from hot tent use before folding; embers can leave pinholes that weaken fabric over time.
- Store poles unstacked or loosely bundled to avoid stress fractures in shock cords.
- Re-seal seams and re-treat waterproof coatings annually if you're using the tent hard through multiple winters.
- Check zippers and stove jack grommets each fall before your first trip — small tears are easier to patch at home than at a snowy site.
Before heading out, always check current Environment and Climate Change Canada forecasts and your destination's fire ban status, since even winter conditions can shift quickly in the mountains.
People Also Ask
What is the difference between a 4-season tent and a winterized camping tent?
A 4-season tent is built to handle snow load and wind but still relies on your body heat and a sleep system to stay warm inside. A winterized camping tent usually goes a step further — think hot tents with a stove jack, or heavily insulated canvas prospector-style shelters designed for active heating. Both are rated for cold, but "winterized" often implies you're bringing an actual heat source along, not just tougher fabric and poles.
Can you use a regular 3-season tent in Canadian winter camping?
Technically yes, in mild shoulder-season conditions, but it's risky once temperatures drop below freezing or snow starts piling up. Most 3-season tents have mesh panels that let heat escape and aren't built to shed heavy snow load, so poles can bend or snap under weight. If you're camping in Ontario, Alberta or BC in January, spend the money on a proper winter-rated tent — it's not the place to cut corners.
How do you keep a tent warm while winter camping in Canada?
A good sleep system does most of the work: a cold-rated sleeping bag, a solid insulated pad (or two stacked), and a groundsheet to block ground chill. Hot tent campers add a small wood stove for real ambient heat, which is a game-changer on nights dipping below -20°C. Simple tricks help too — a hot water bottle in your bag, eating a warm meal before bed, and sealing your tent's vents just enough to cut drafts without trapping moisture.
What features should I look for when buying a winter tent for snow and extreme cold?
Look for a steep-walled design that sheds snow rather than collecting it, aluminum poles rated for cold and snow load, and reinforced guy-out points for anchoring in deep snow. Ventilation matters more than people expect — you need airflow to manage condensation, even in the cold. If you're leaning toward a hot tent setup, confirm the stove jack is properly fire-rated before your first trip, and always check current fire ban and weather conditions through Environment and Climate Change Canada before heading out.